Koding integration
Introduced in GitLab 8.11.
This document will guide you through using Koding integration on GitLab in detail. For configuring and installing please follow the administrator guide.
You can use Koding integration to run and develop your projects on GitLab. This will allow you and the users to test your project without leaving the browser. Koding handles projects as stacks which are basic recipes to define your environment for your project. With this integration you can automatically create a proper stack template for your projects. Currently auto-generated stack templates are designed to work with AWS which requires a valid AWS credential to be able to use these stacks. You can find more information about stacks and the other providers that you can use on Koding following the Koding documentation.
Enable Integration
You can enable Koding integration by providing the running Koding instance URL
in Application Settings under Admin area > Settings (/admin/application_settings).

Once enabled you will see Koding link on your sidebar which leads you to
Koding Landing page.
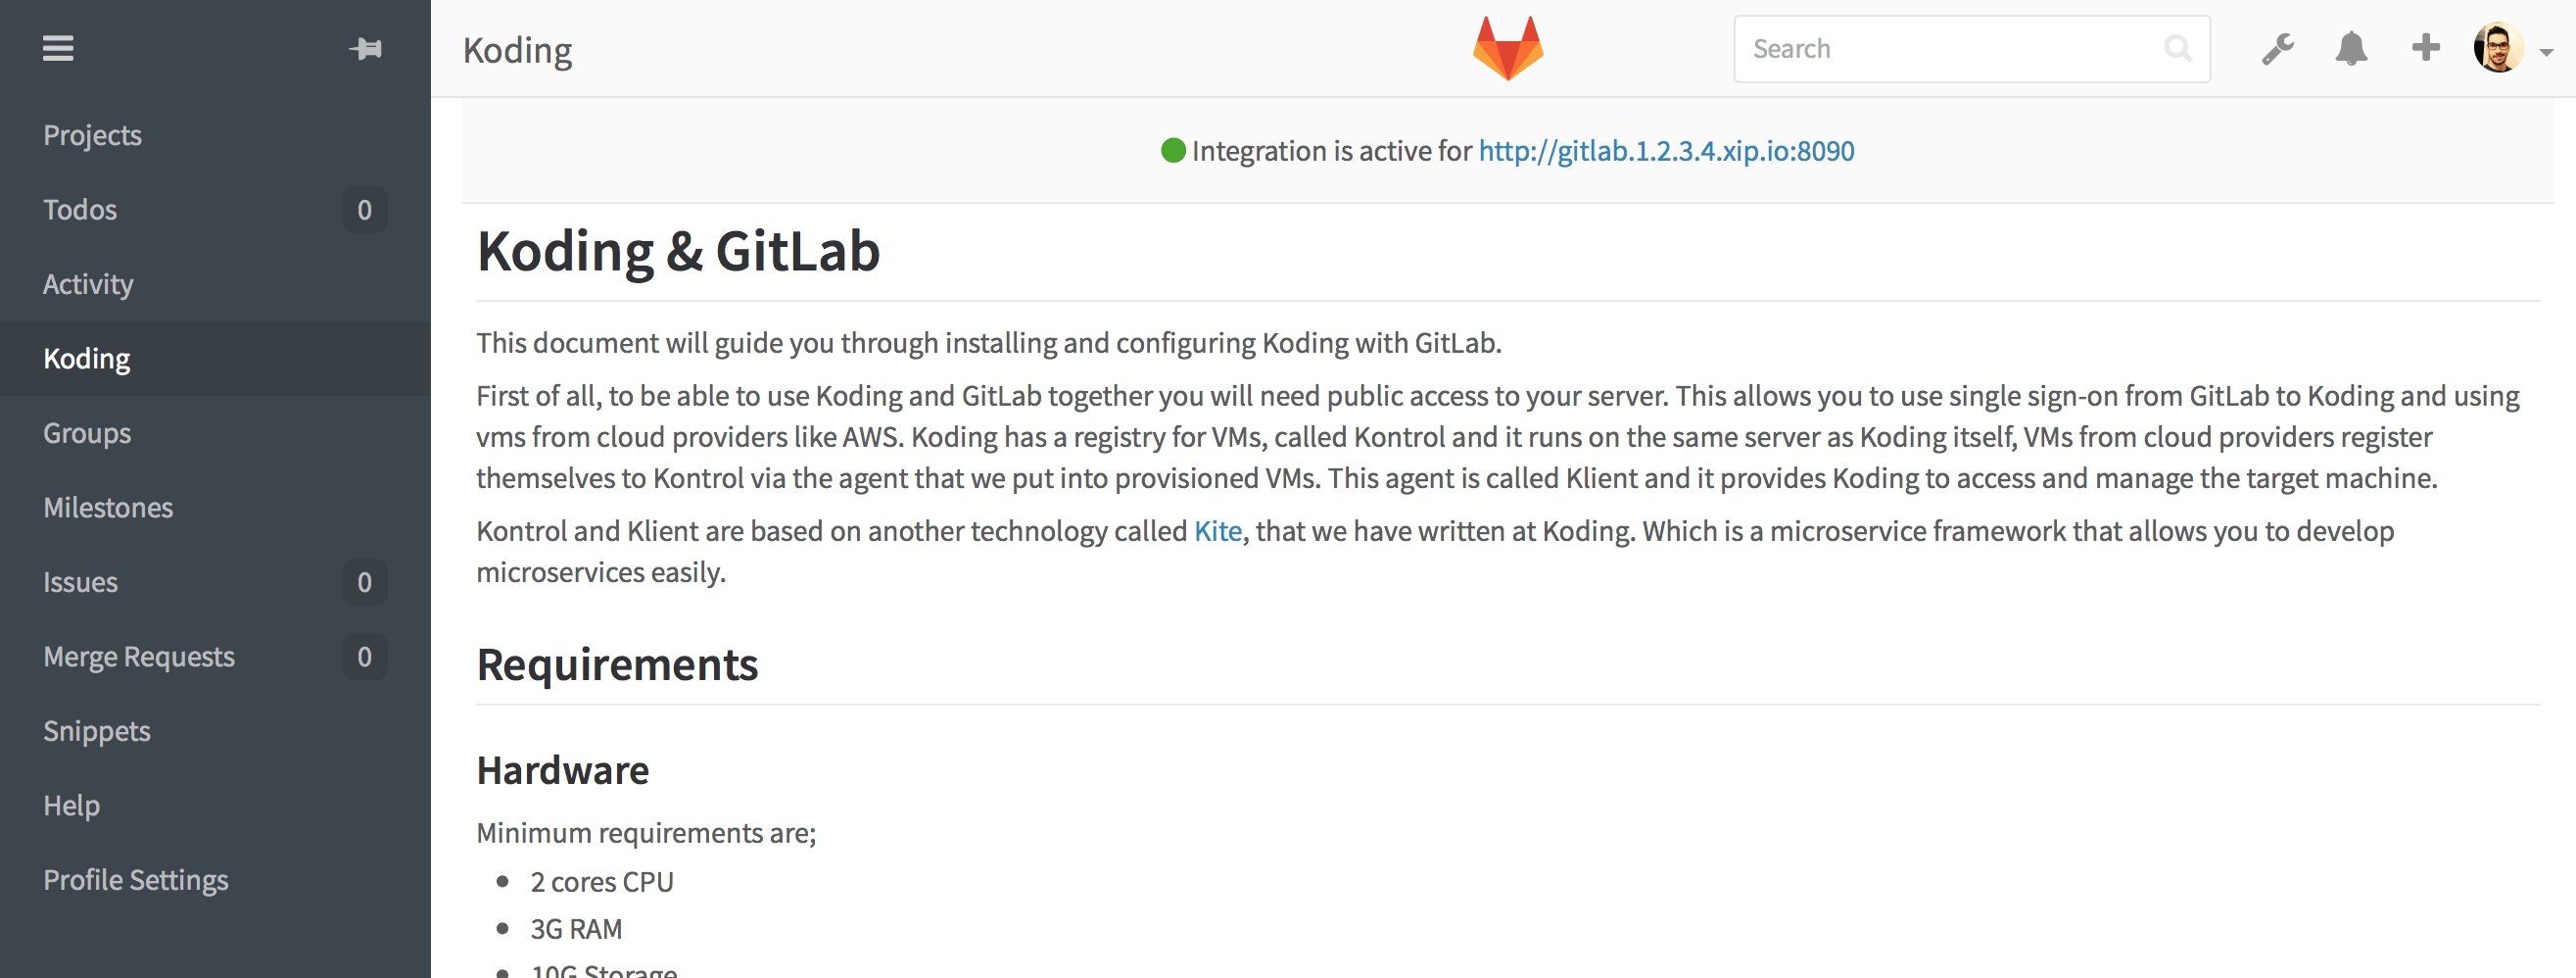
You can navigate to running Koding instance from here. For more information and details about configuring the integration, please follow the administrator guide.
Set up Koding on Projects
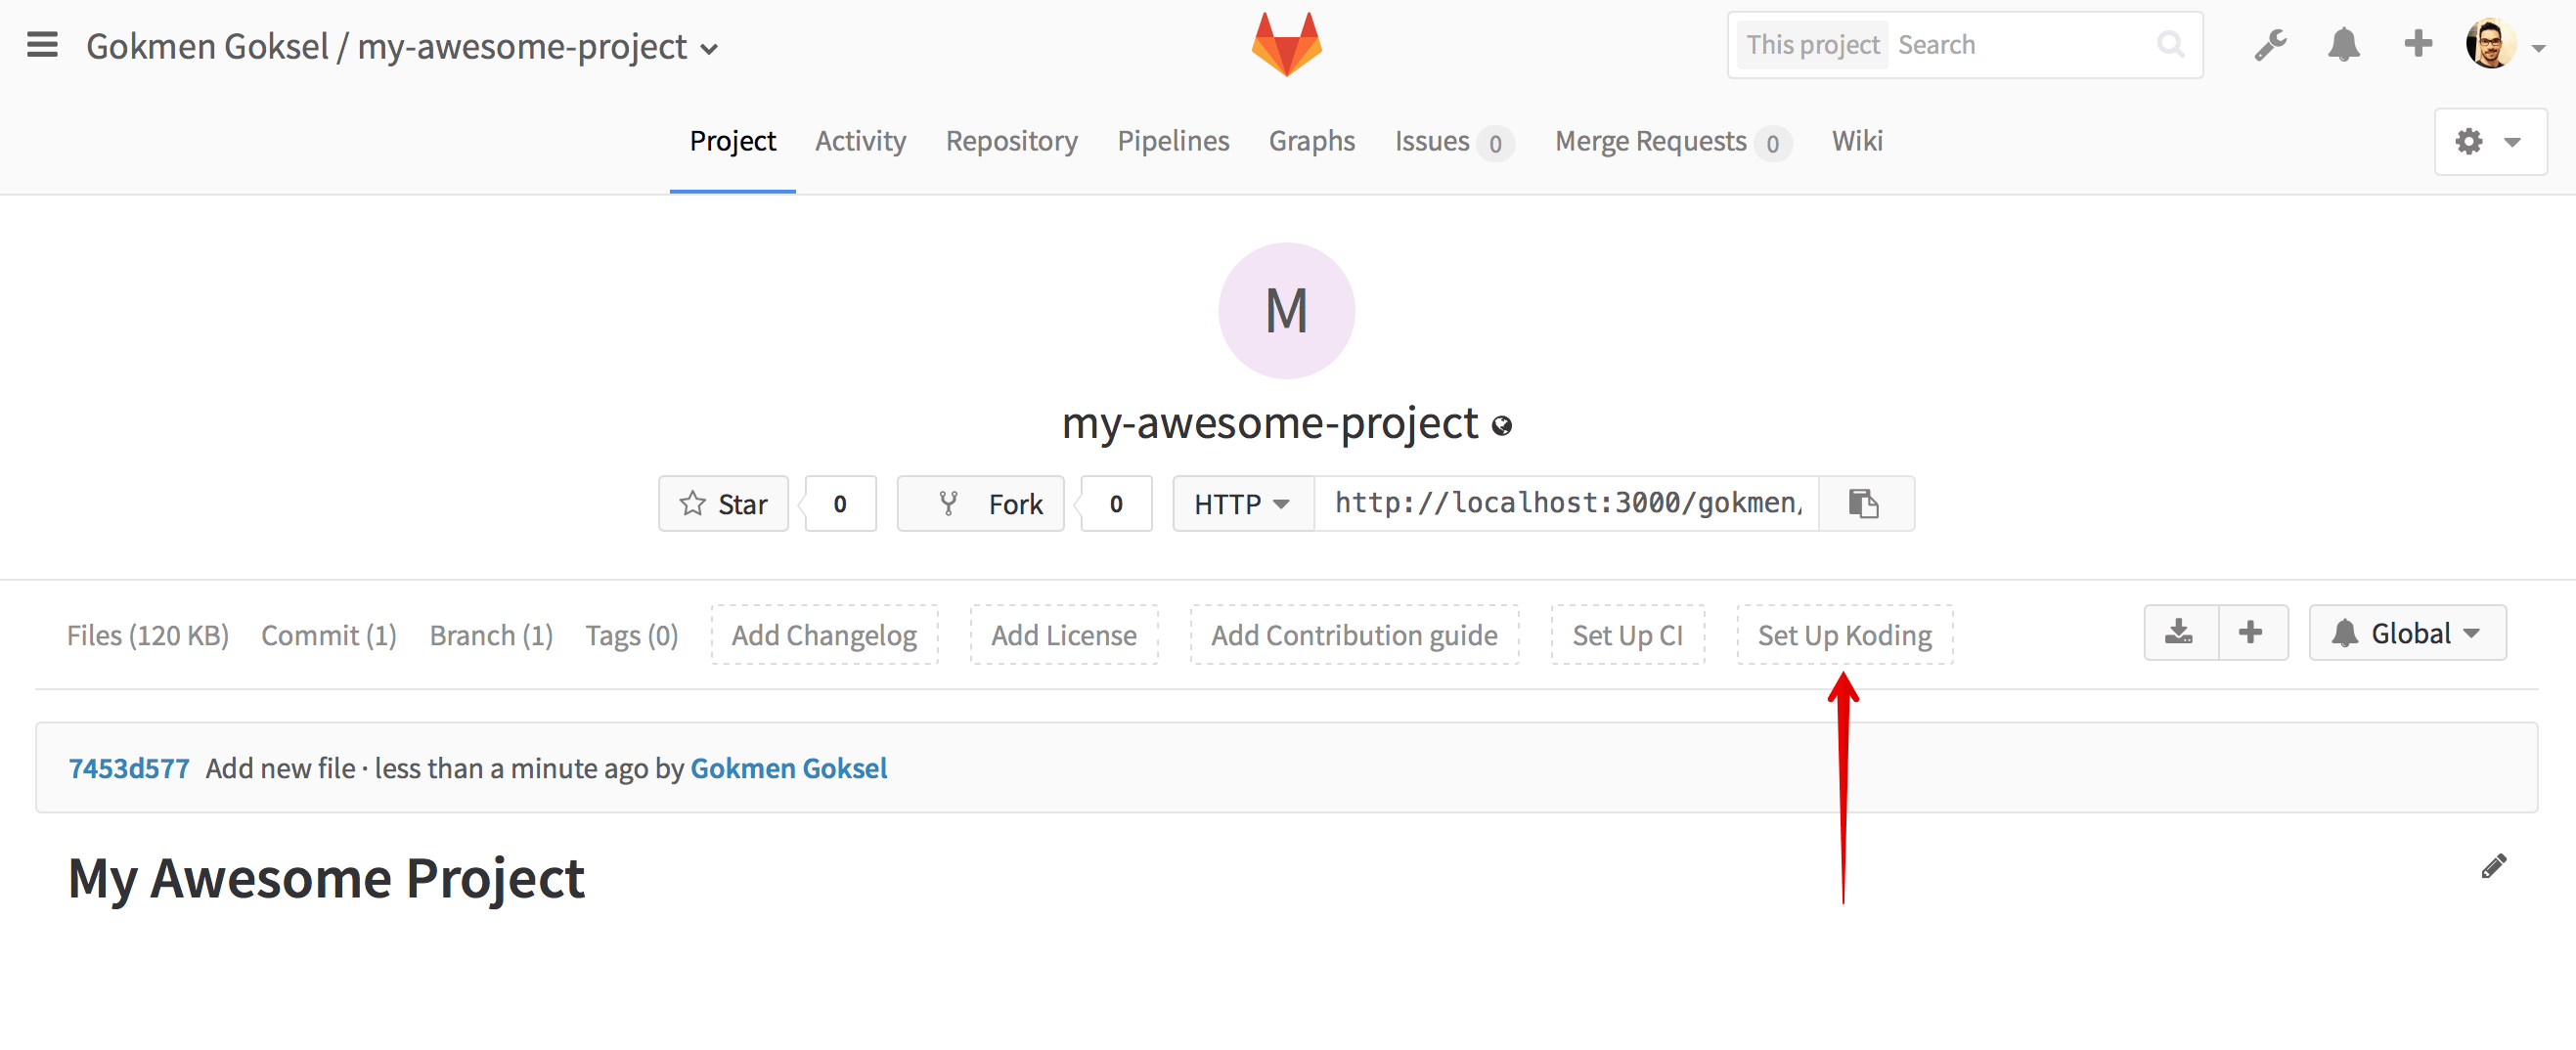
Once it's enabled, you will see some integration buttons on Project pages,
Merge Requests etc. To get started working on a specific project you first need
to create a .koding.yml file under your project root. You can easily do that
by using Set Up Koding button which will be visible on every project's
landing page;
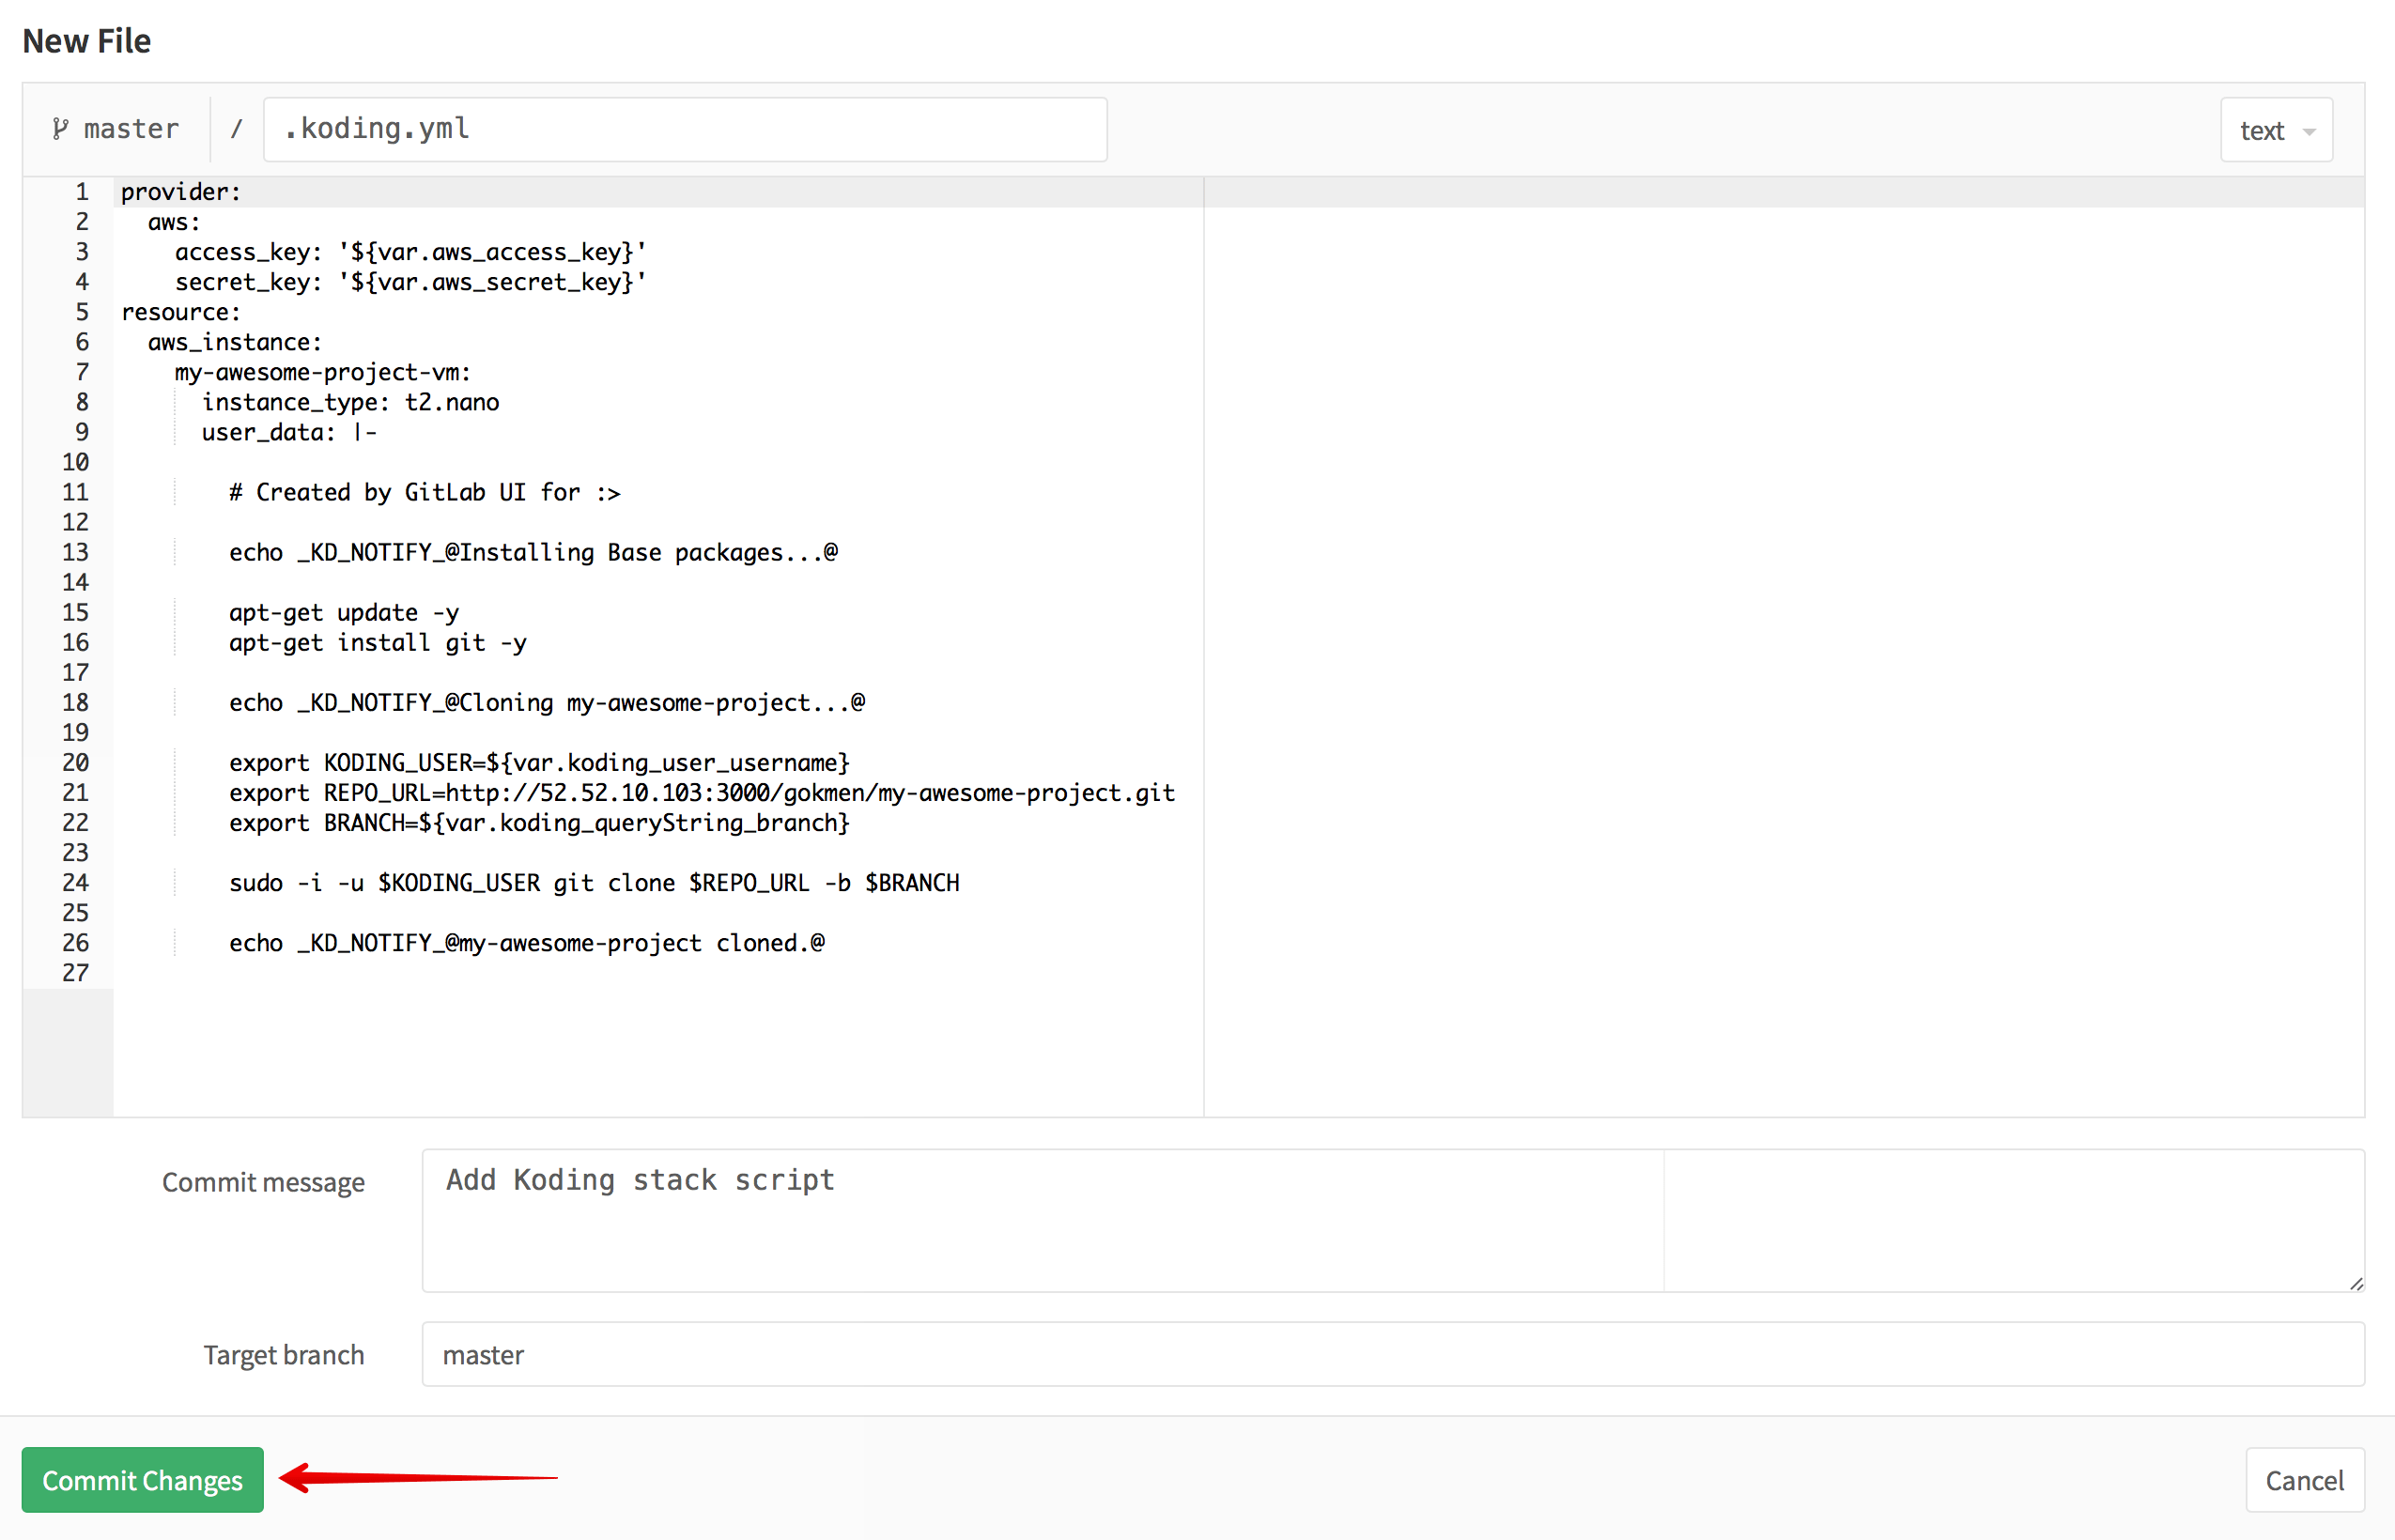
Once you click this will open a New File page on GitLab with auto-generated
.koding.yml content based on your server and repository configuration.
Run a project on Koding
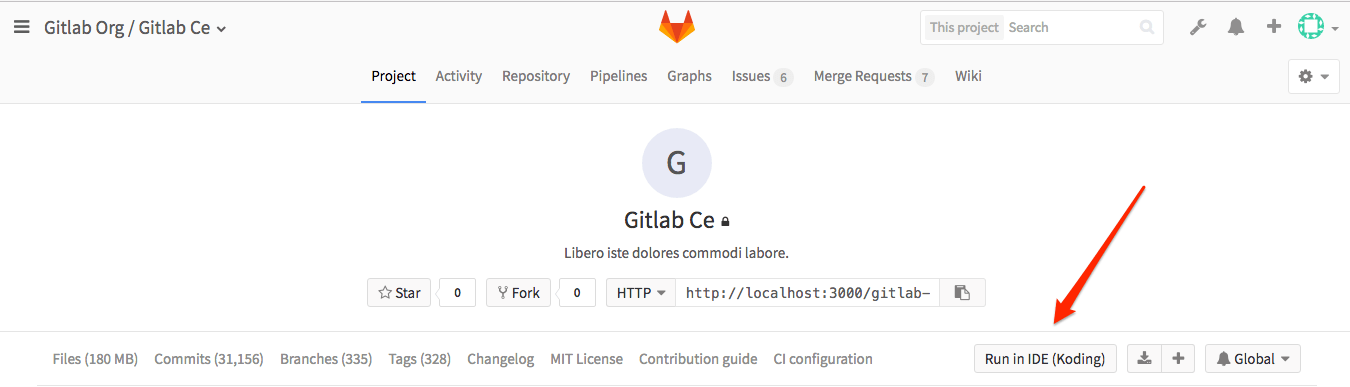
If there is .koding.yml exists in your project root, you will see
Run in IDE (Koding) button in your project landing page. You can initiate the
process from here.
This will open Koding defined in the settings in a new window and will start importing the project's stack file.

You should see the details of your repository imported into your Koding instance. Once it's completed it will lead you to the Stack Editor and from there you can start using your new stack integrated with your project on your GitLab instance. For details about what's next you can follow this guide from step 8.
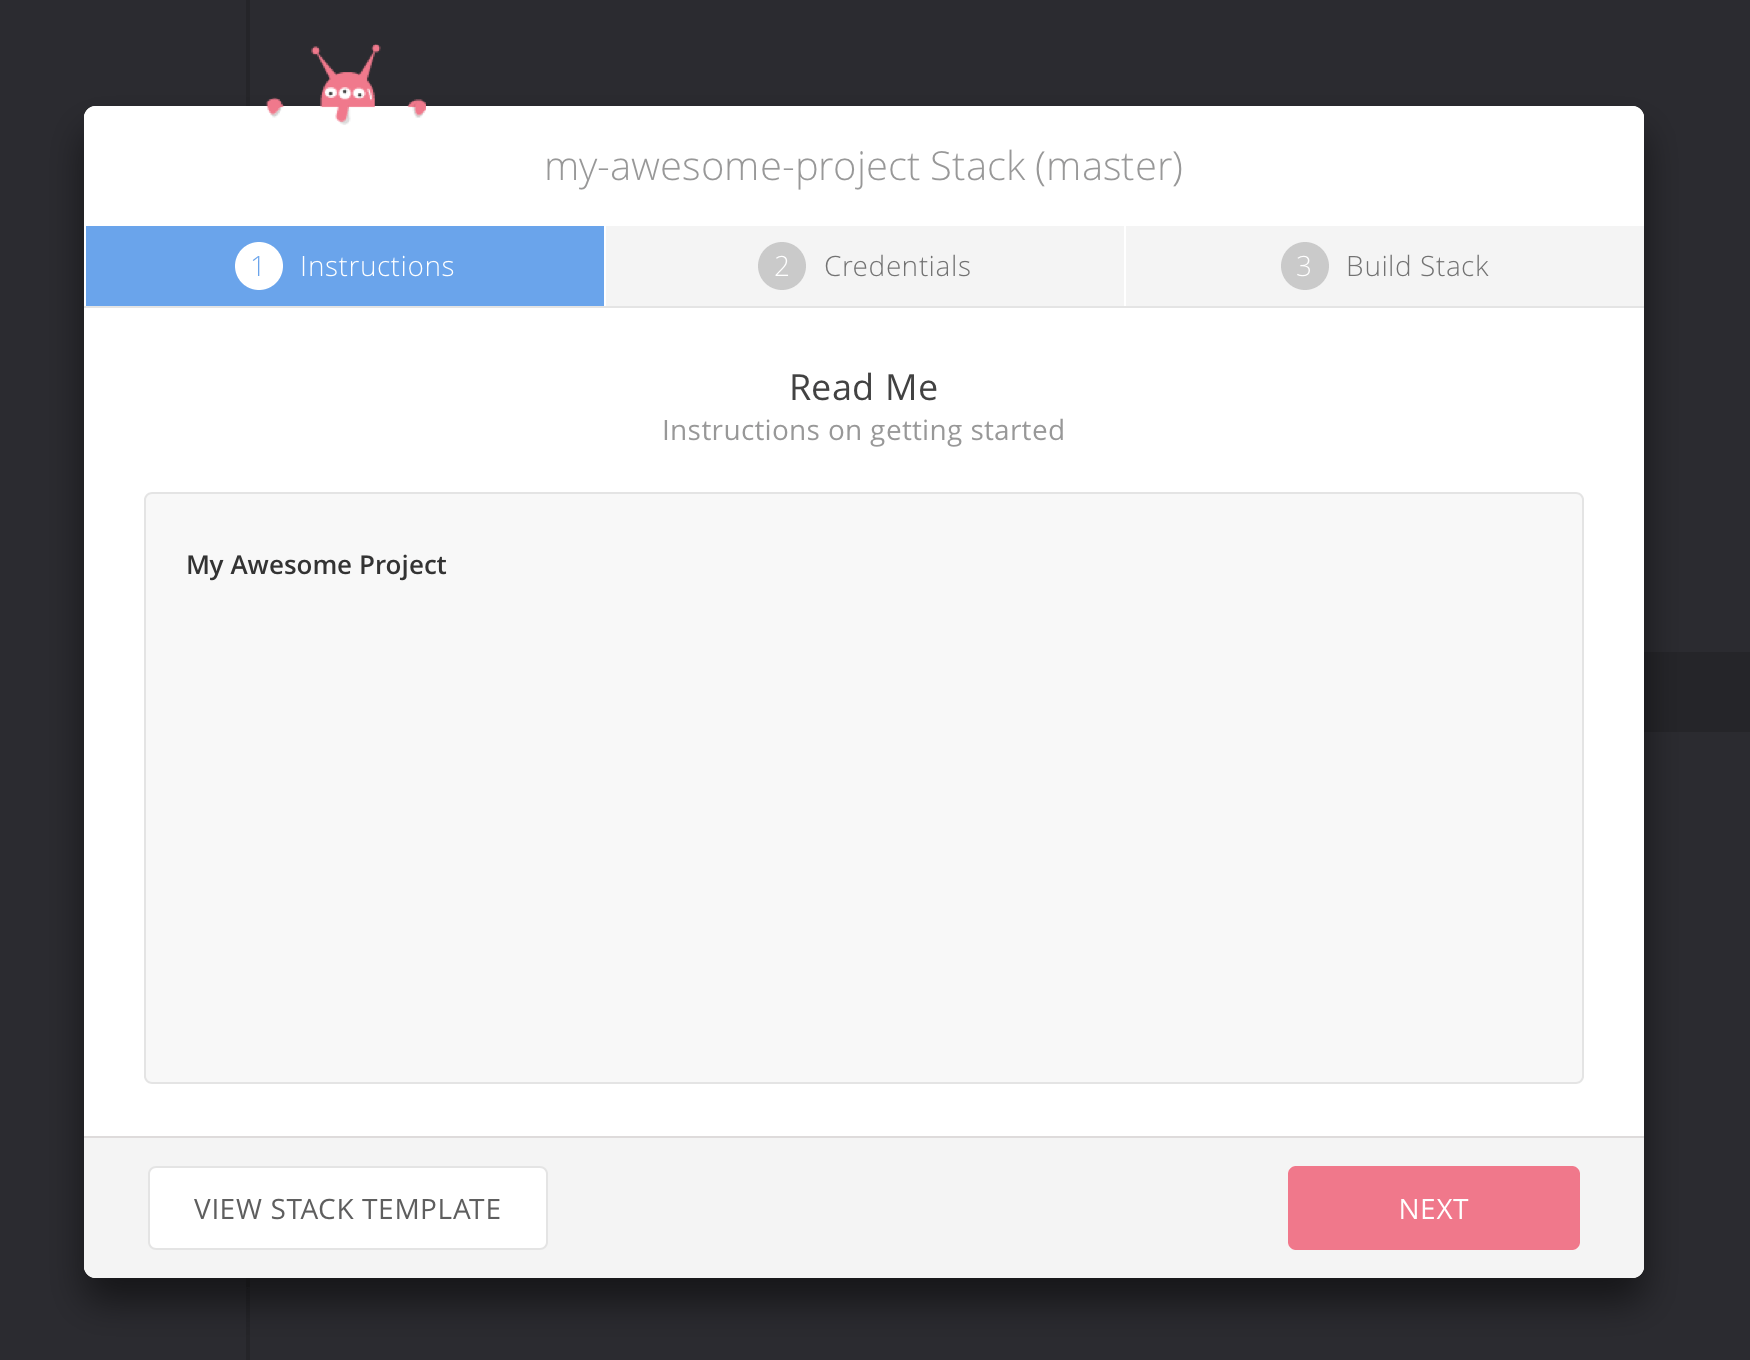
Once stack initialized you will see the README.md content from your project
in Stack Build wizard, this wizard will let you build the stack and import
your project into it. Once it's completed it will automatically open the
related vm instead of importing from scratch.
This will take time depending on the required environment.

It usually takes ~4 min. to make it ready with a t2.nano instance on given
AWS region. (t2.nano is default vm type on auto-generated stack template
which can be manually changed).
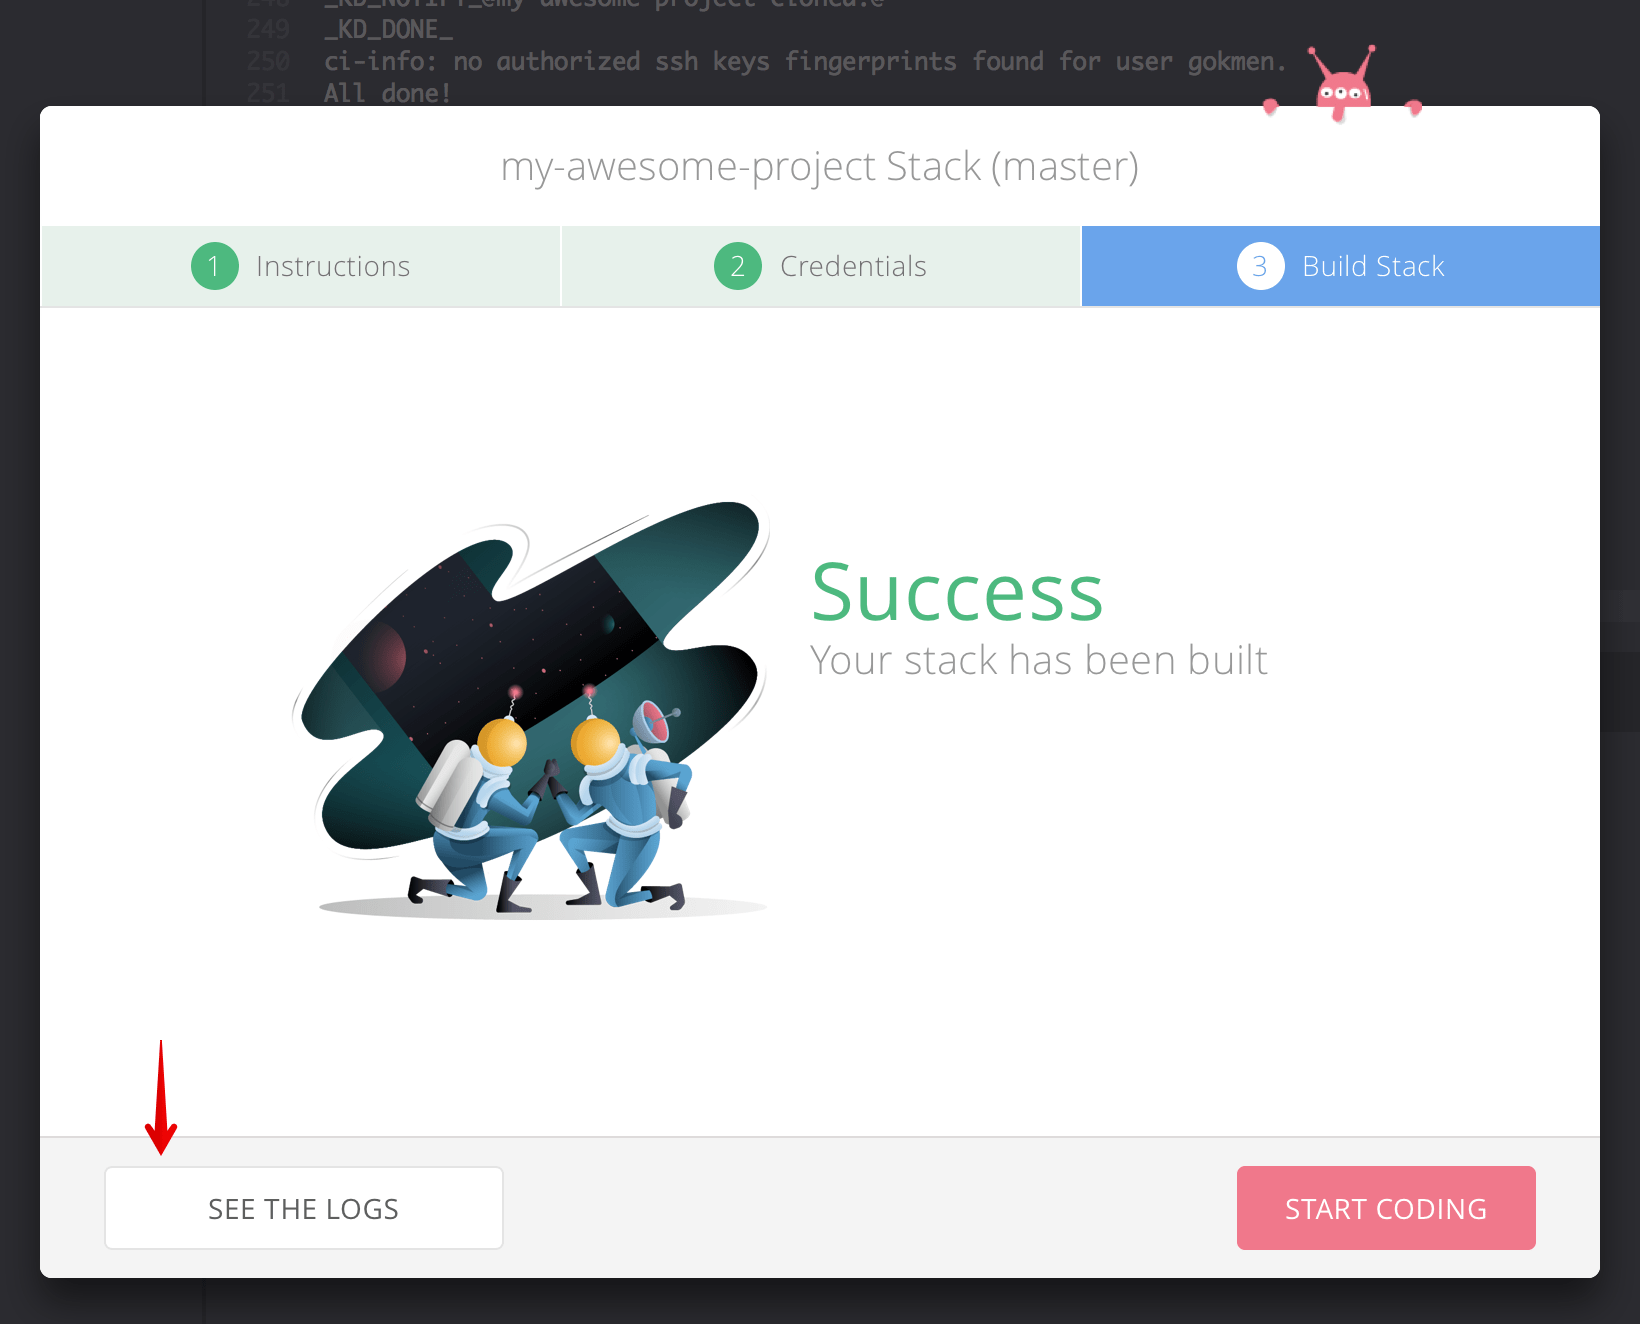
You can check out the Build Logs from this success modal as well.

You can now Start Coding!
Try a Merge Request on IDE
It's also possible to try a change on IDE before merging it. This flow only
enabled if the target project has .koding.yml in it's target branch. You
should see the alternative version of Run in IDE (Koding) button in merge
request pages as well;
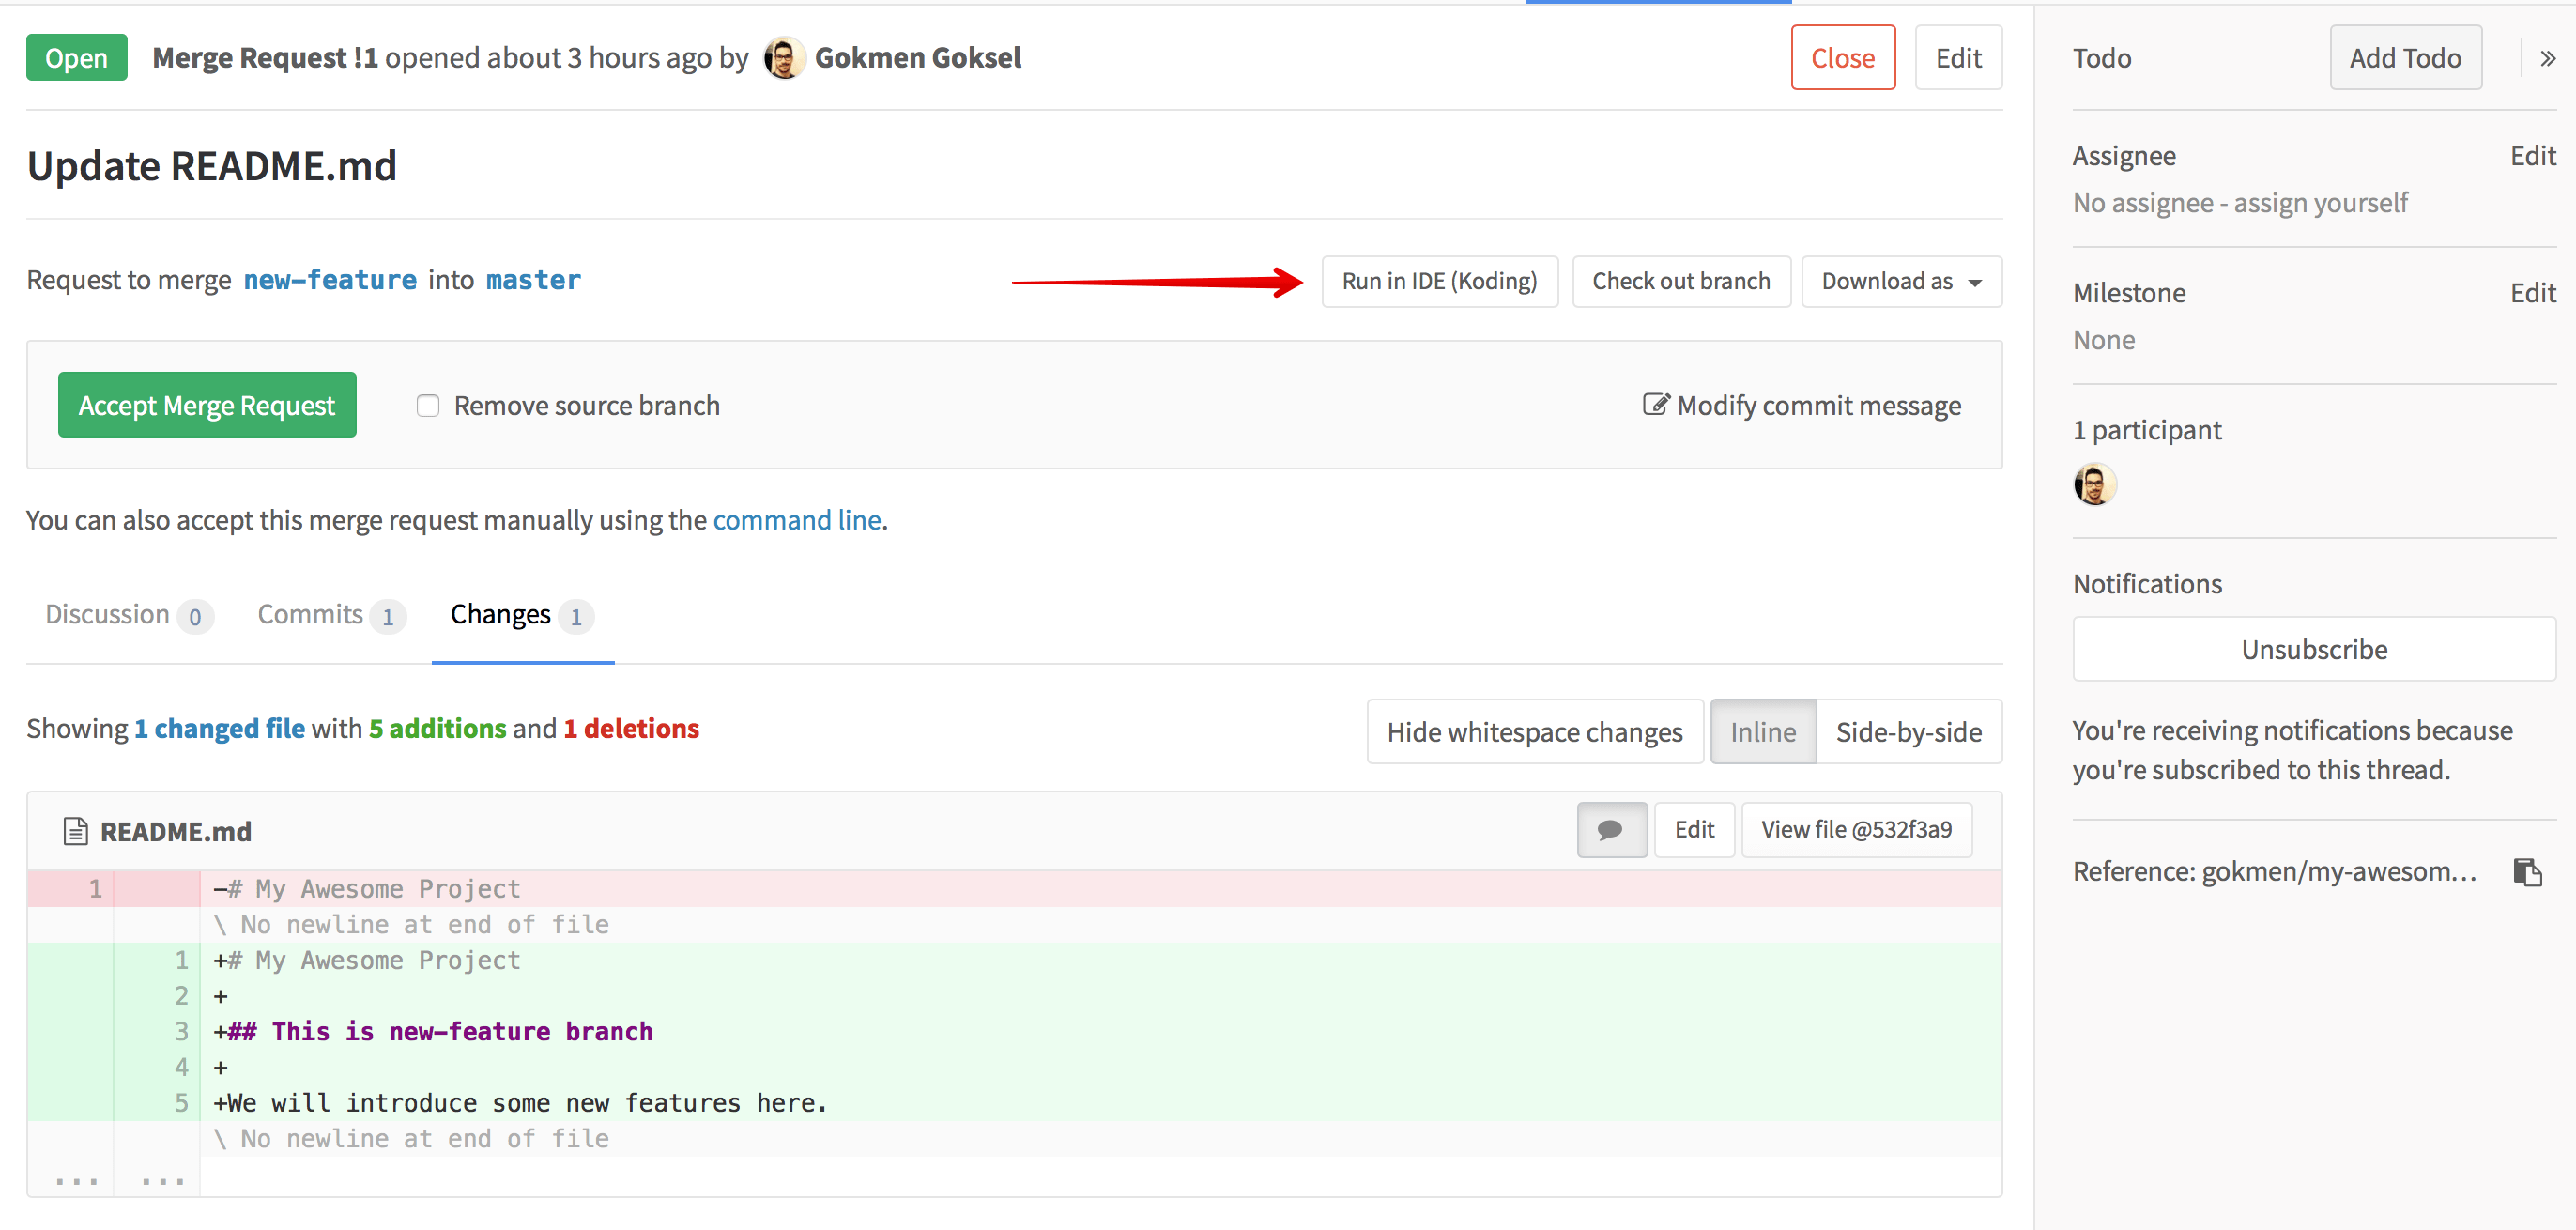
This will again take you to Koding with proper arguments passed, which will allow Koding to modify the stack template provided by target branch. You can see the difference;

The flow for the branch stack is also same with the regular project flow.
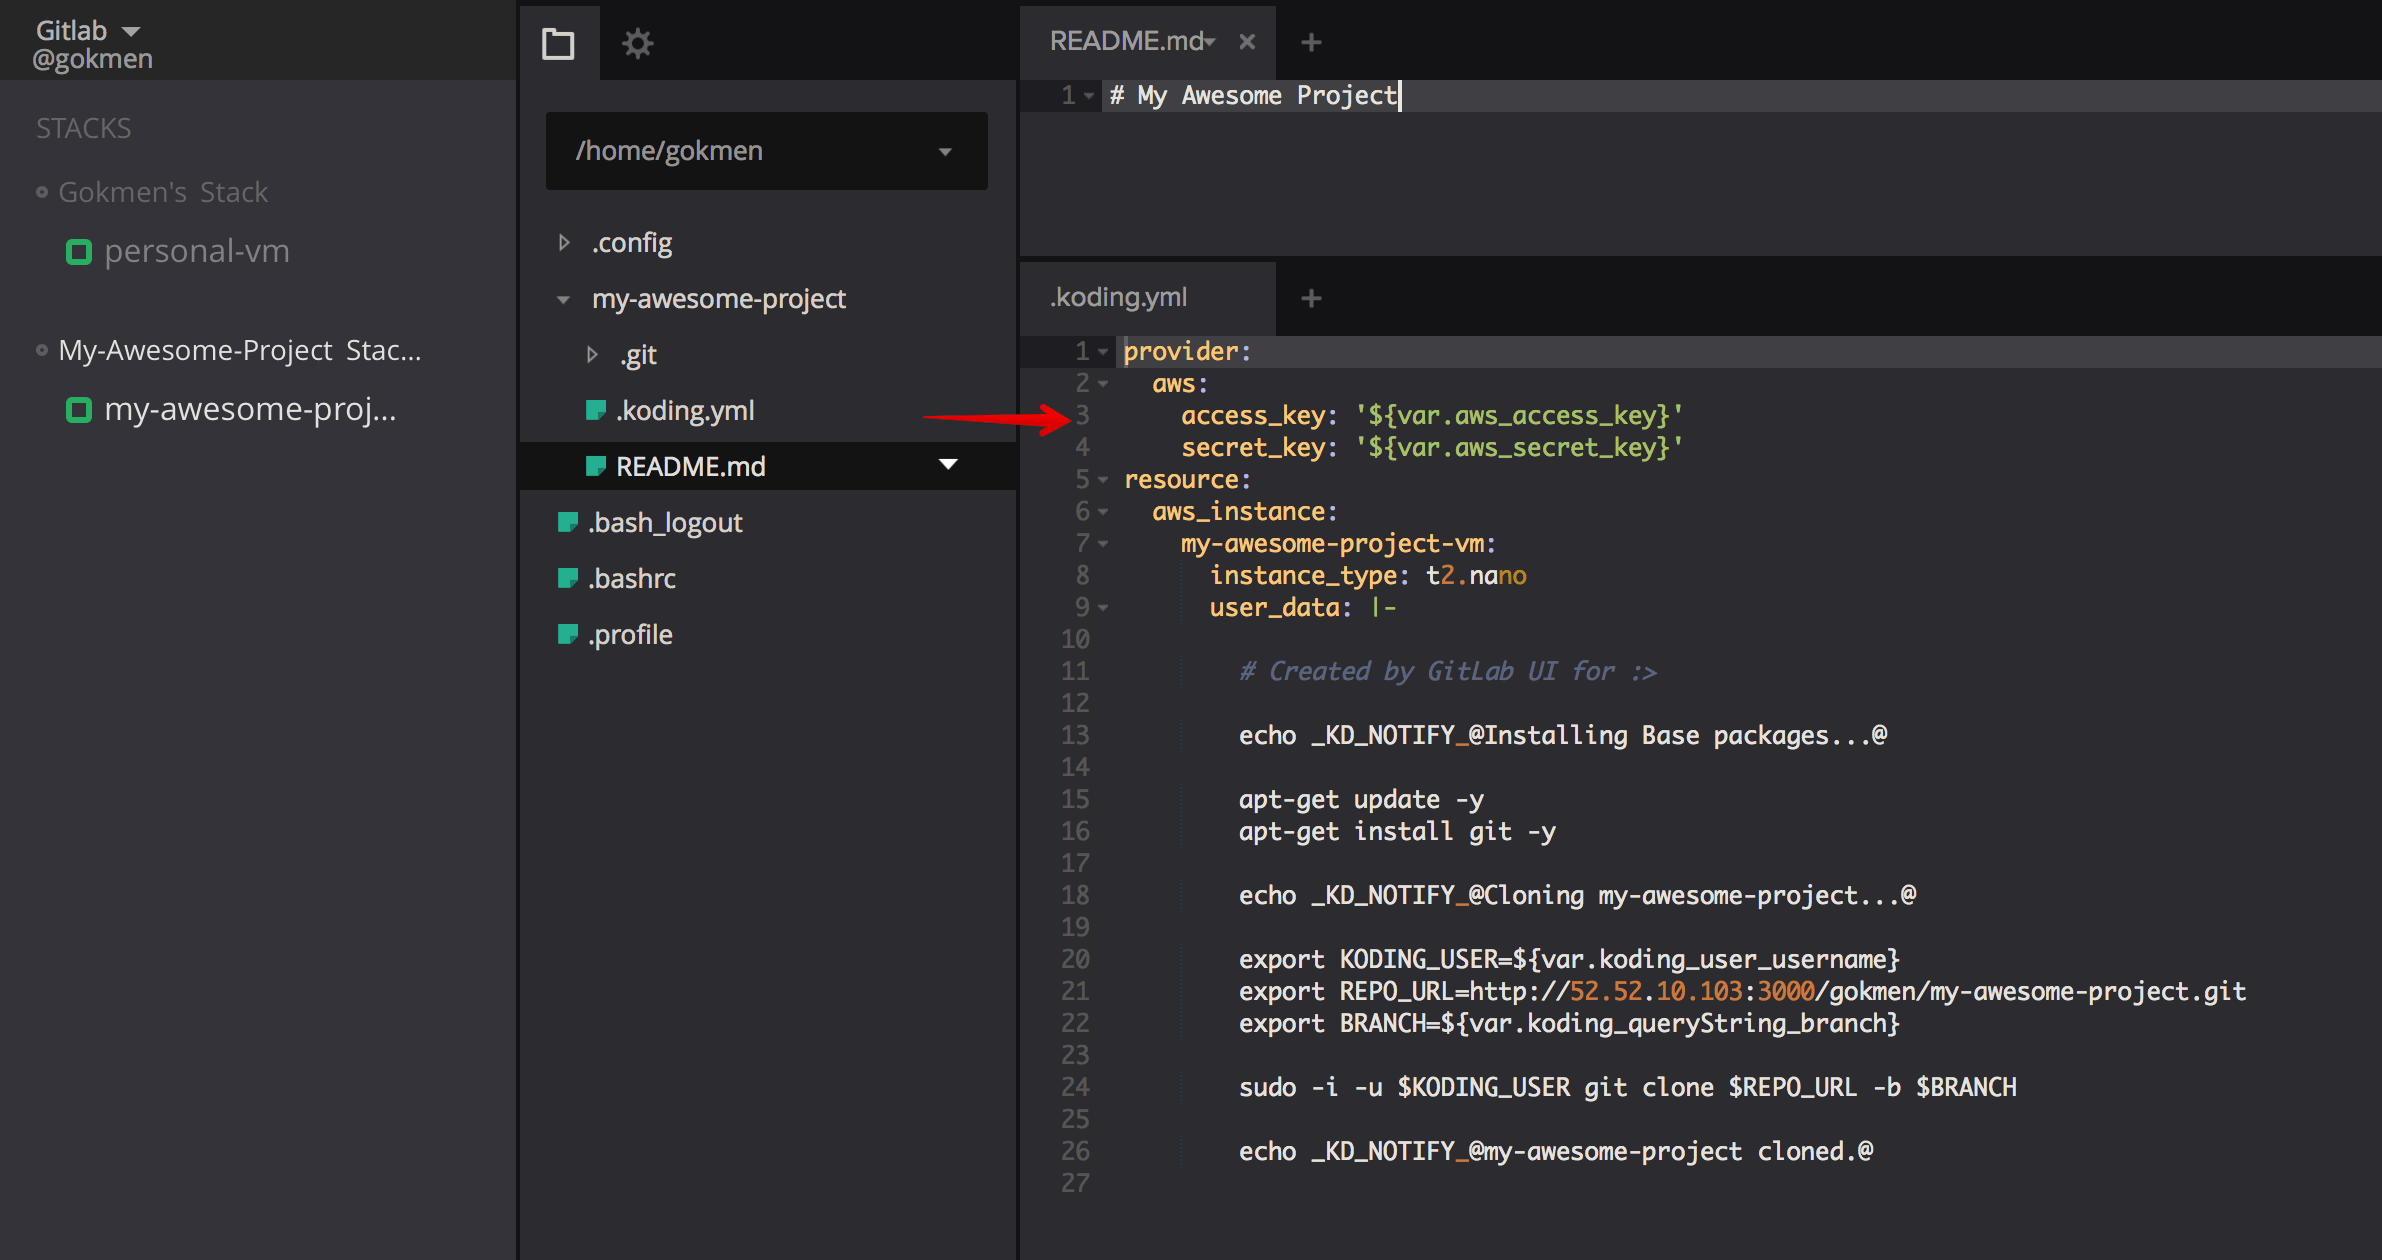
Open GitLab from Koding
Since stacks generated with import flow defined in previous steps, they have information about the repository they are belonging to. By using this information you can access to related GitLab page from stacks on your sidebar on Koding.
